Apple Pie
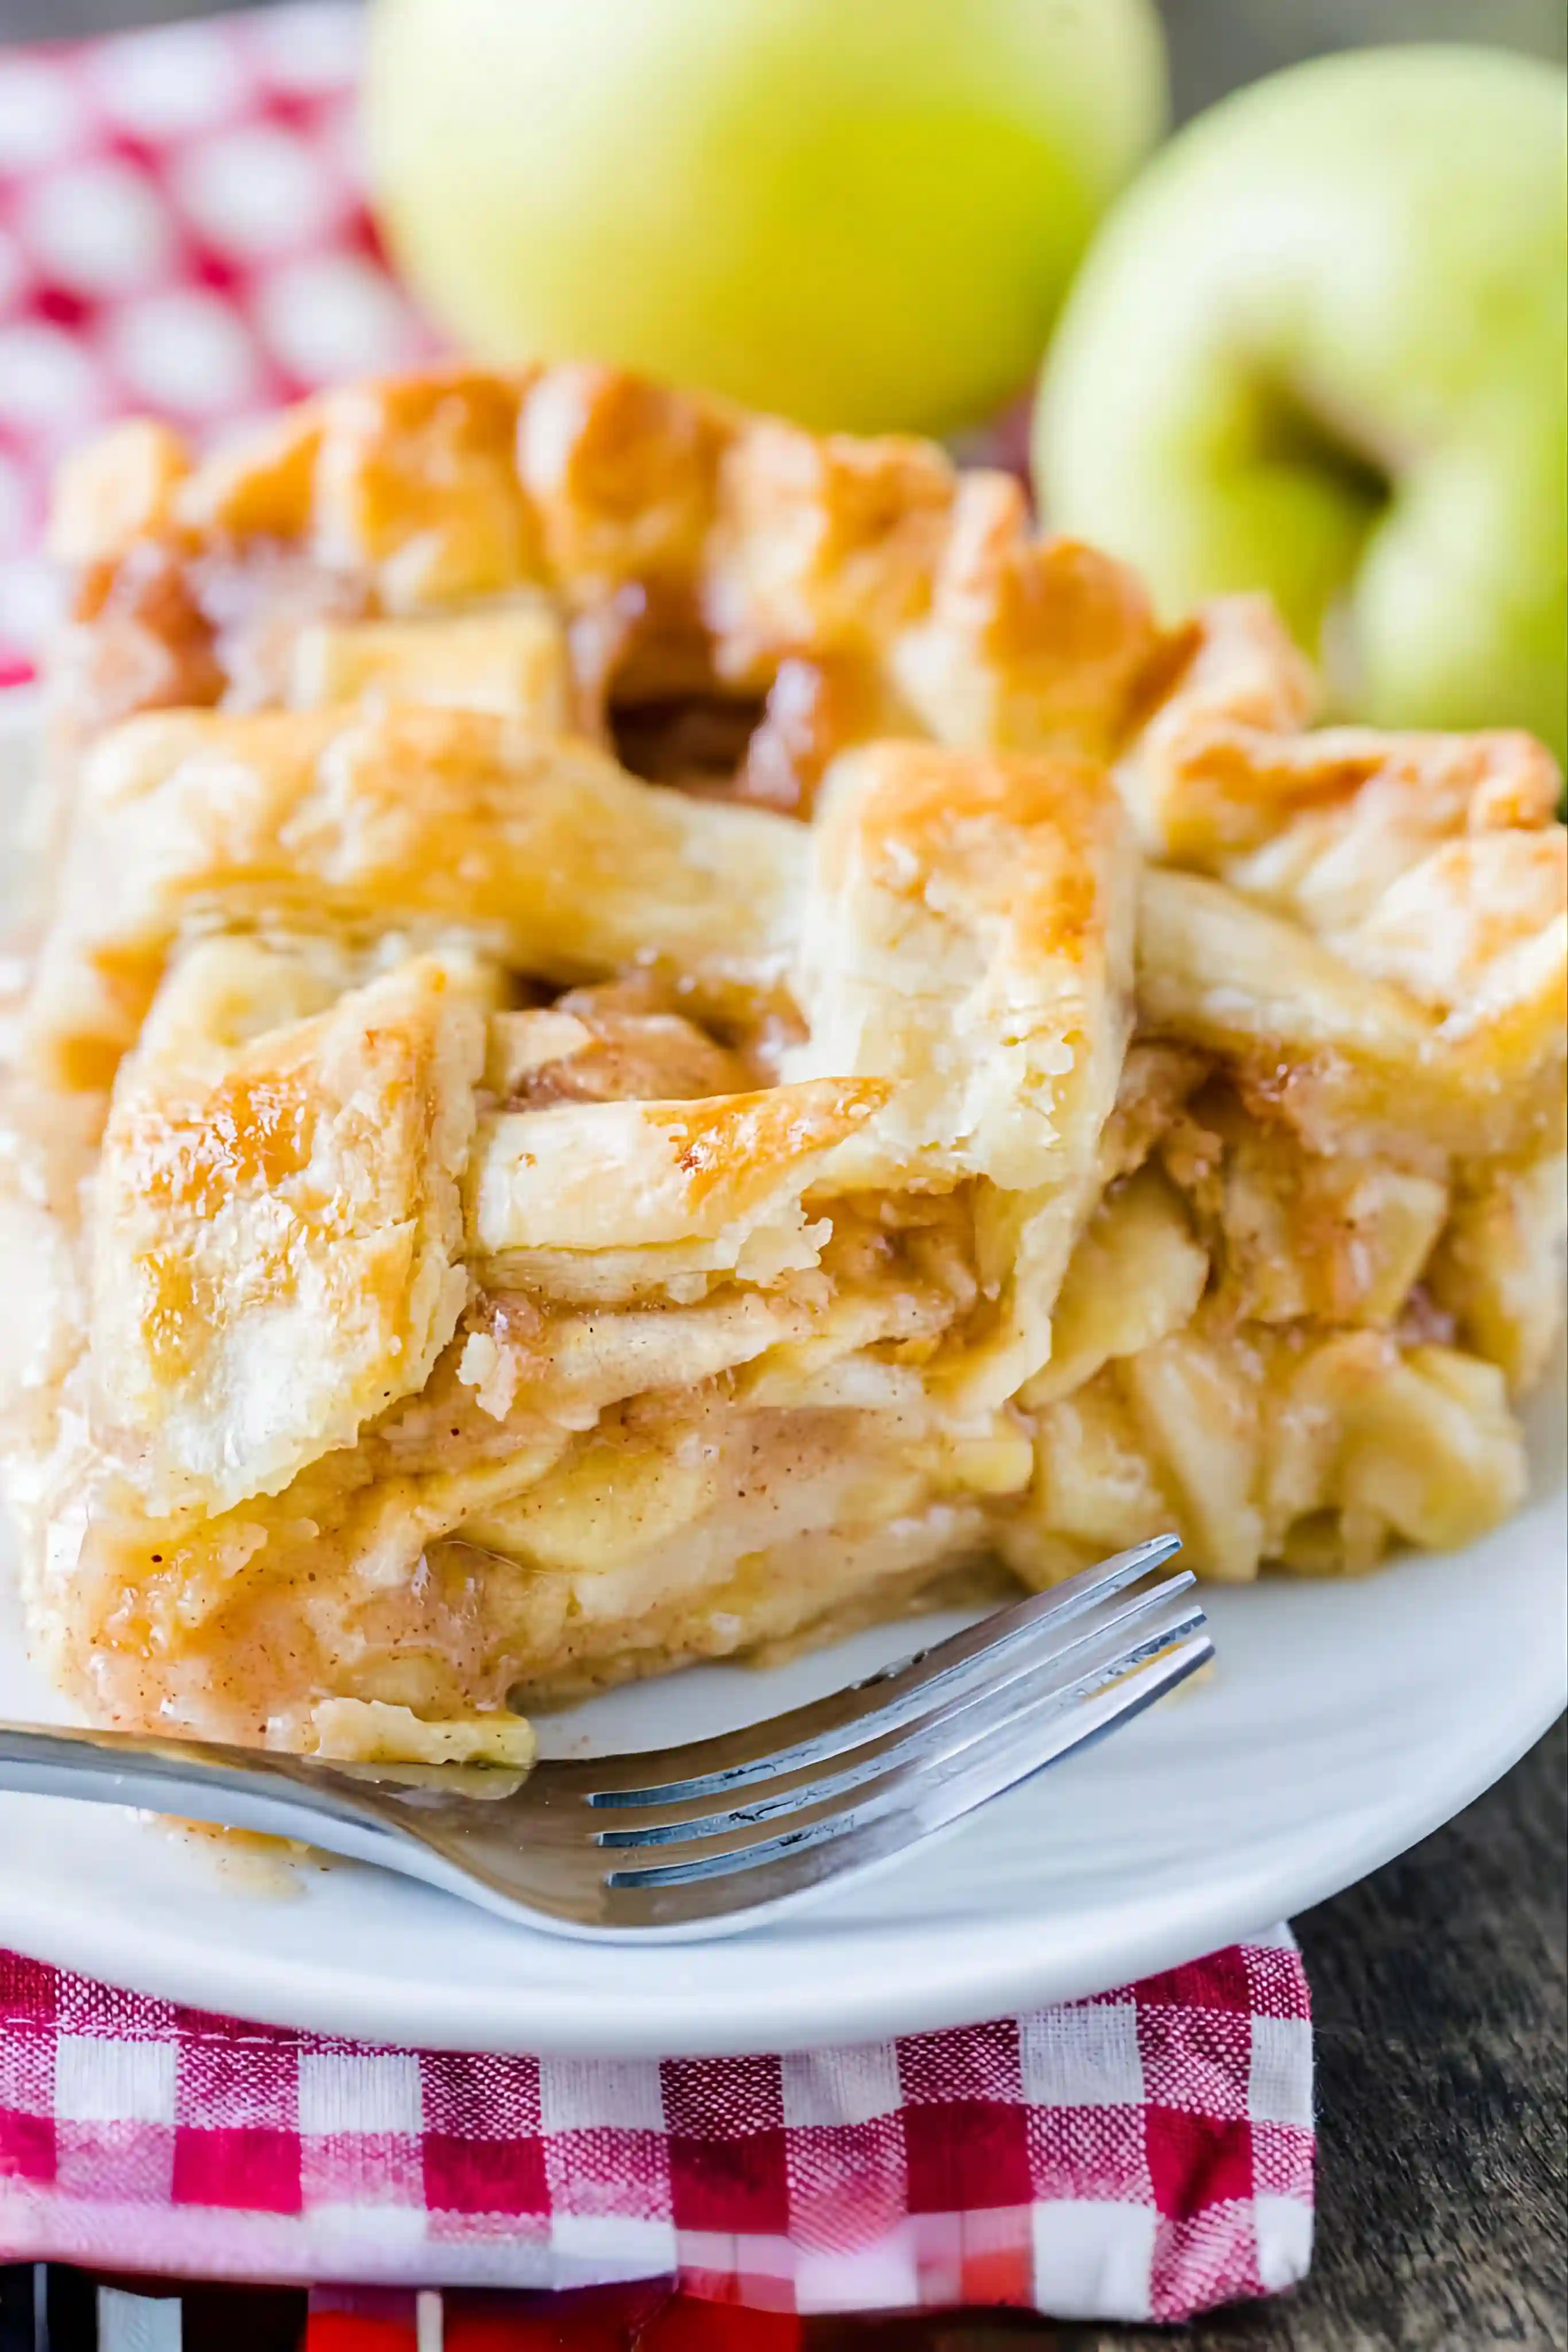
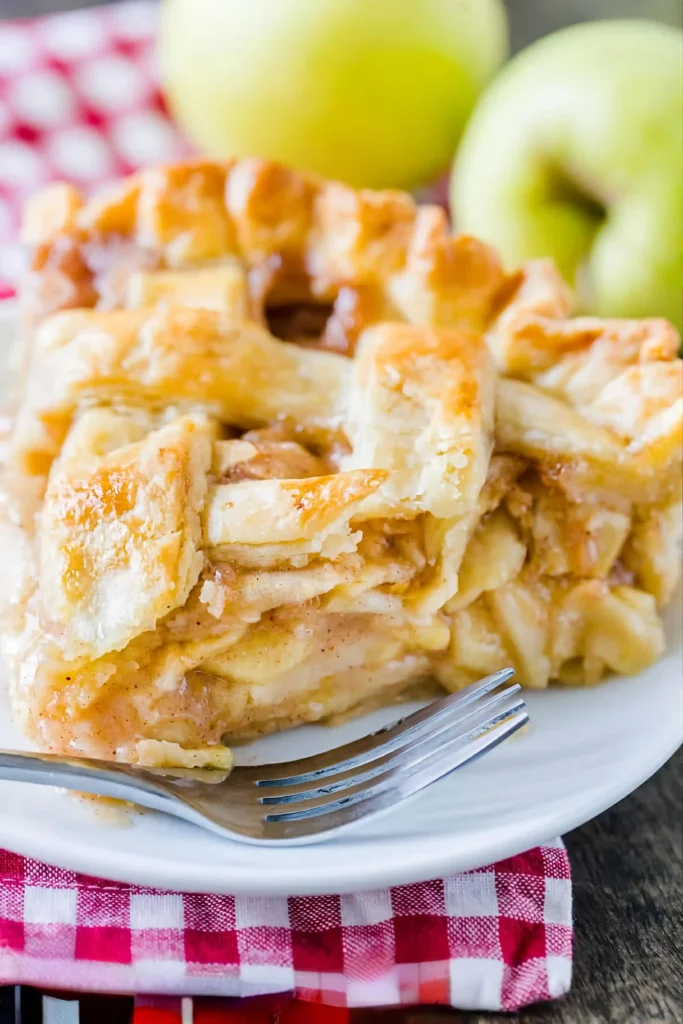
With a mountain of gooey cinnamon apples nestled under a perfectly buttery and flaky pie crust, this is most certainly my favorite apple pie recipe. To bring out the best apple flavor and texture, pre-cook the filling for about 5 minutes on the stove. Bake and cool the pie, and then top with vanilla ice cream for the ultimate homestyle dessert.
Here’s Why You’ll Love This Apple Pie, Too
- Classic recipe, without any complicated ingredients
- Golden flaky double pie crust provides a crisp contrast to the soft and juicy filling
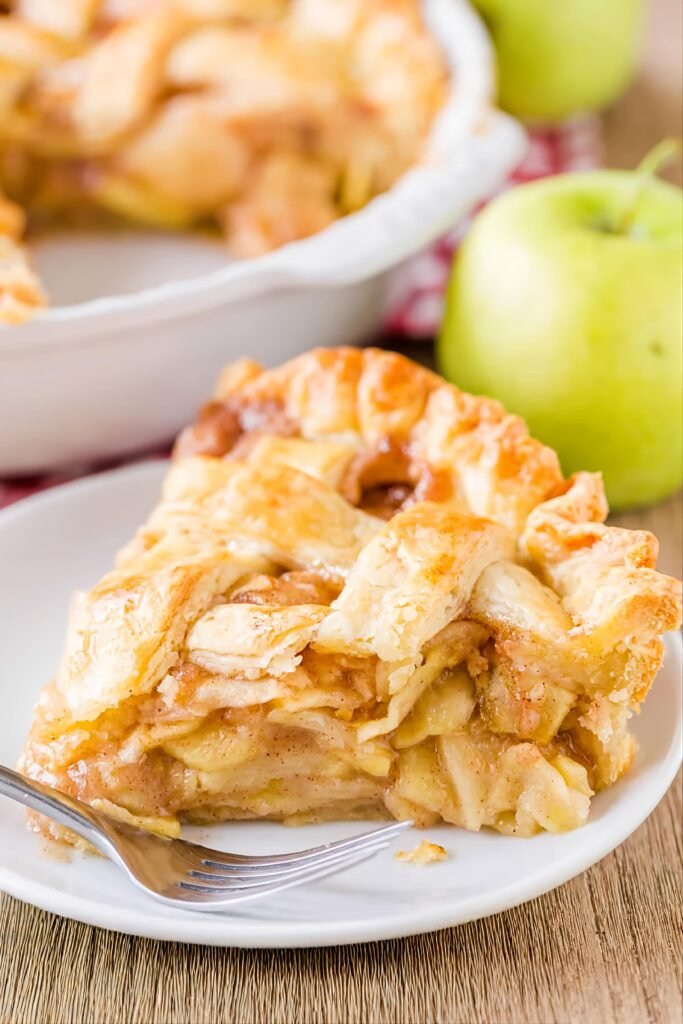
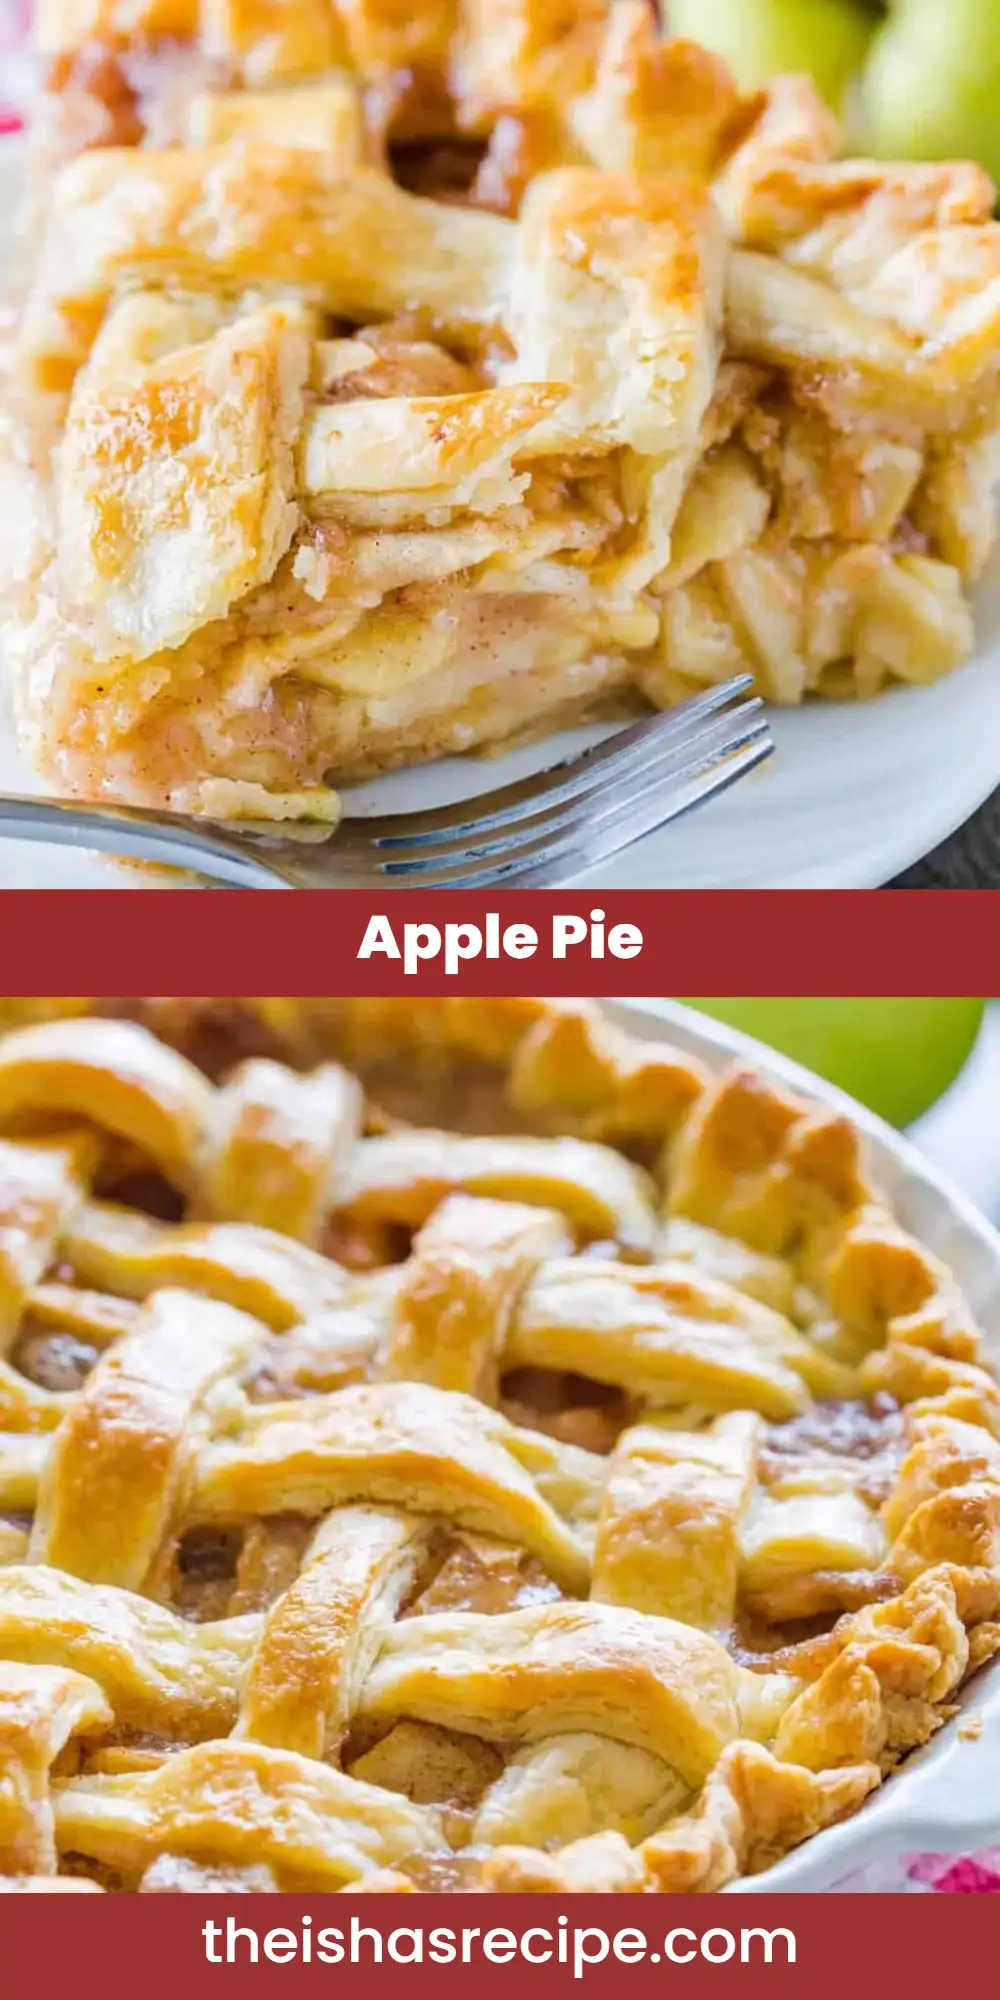
- Caramelized filling peeking through the lattice
- Tall slices with oodles of tender apples that aren’t overly mushy
- Comforting, nostalgia-filled flavor
- Completely out-of-this-world with a scoop of vanilla ice cream on top
This pie is deep-dish style, but you don’t need a super special pie dish to get started. Any 1.5- to 2-inch-deep pie dish works here. You’ll simply pile those apple slices nice and high!
Begin With Quality Pie Crust
You need a sturdy crust to hold in the mountain of apples. Whether you’re a pie crust beginner or pro, I encourage you to read through my pie crust recipe. There’s nothing quite like homemade pie crust and my grandmother’s recipe has consistently proven its authority over the past several decades. It’s our family’s favorite, and I’ve been using it ever since I could lift a rolling pin.
This recipe uses both butter and shortening to provide a quality combination of sturdy, flaky, and buttery. I also have an all butter pie crust if you’re interested.
Key Ingredients You Need
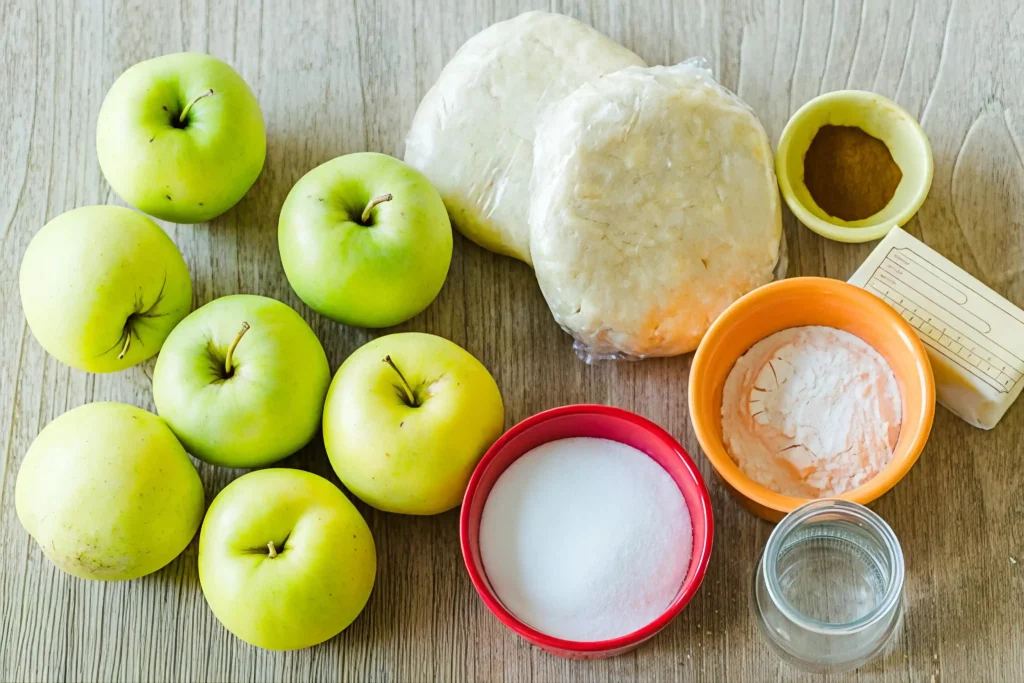
Once you have your pie dough ready, you can gather the rest of the ingredients. My apple pie recipe has a deliciously gooey, sweet, and spiced apple filling. The ingredients in the filling are my go-to choices for most apple pie recipes including my salted caramel apple pie, too.
- Apples – It’s best to use a variety of apples in apple pie. Just like when we make apple cake or apple cobbler, I recommend using half tart and half sweet. I love tart Granny Smith apples paired with a sweet variety such as Pink Lady, Honeycrisp, Jazz, or Fuji. Here is a complete list of the best apples for baking.
- Spices – Apple pie isn’t apple pie without warm spices like cinnamon and nutmeg. I always add allspice to the filling for a little something extra. I use the same warm blend in baked apple cider French toast and apple zucchini bread, too.
- Lemon – A touch of lemon is crucial here. You don’t use enough to actually taste the lemon; add a splash to prevent the apples from browning and to keep the flavor bright. (Flavor is a bit flat without it, so do not skip this!)
- Sugar – Sugar sweetens the pie filling. You can actually use white granulated sugar or brown sugar here. I typically use white sugar so the apple and spice flavors really shine.
- Flour – Flour thickens the pie filling.
Do you crave extra flavor? You’ll love this apple cranberry pie or chai-spiced apple pie.
What Are the Best Apples to Use for Apple Pie?
Firmer apples are ideal for baking a pie. Avoid soft, mealy, and mushy apples. For depth of flavor, it’s best to bake with a mix of tart and sweet apples. For apple pie, I usually use 4–5 tart and 4 sweet.
- Tart apples for baking: Granny Smith (in my opinion, this is the best overall apple for baking), Braeburn, Jonathan, and Pacific Rose.
- Sweet apples for baking: Jazz, Pazazz (sometimes harder to find but delicious!), Honeycrisp, Pink Lady, SugarBee, SweeTango, and Fuji.
For a detailed list of my favorite apple varieties and when to use each, you can visit my post The Best Apples for Baking.
How to Make Perfect Apple Pie
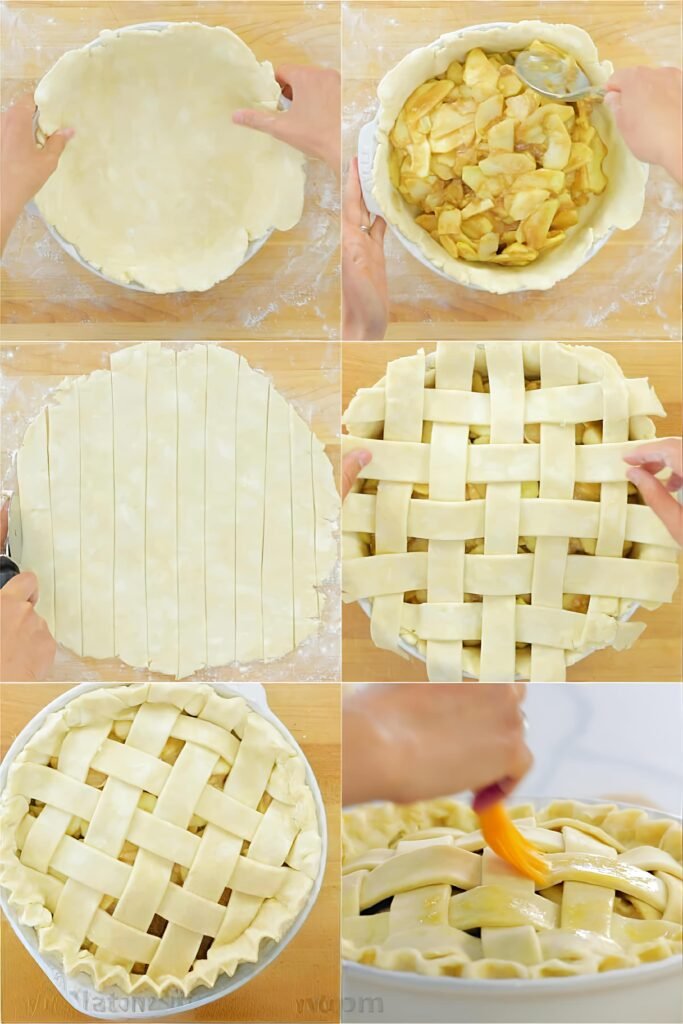
Roll out the bottom pie dough. Tuck the dough into a deep-dish pie plate. Refrigerate as you prepare the filling. Remember, cold pie dough is key to pie-making.
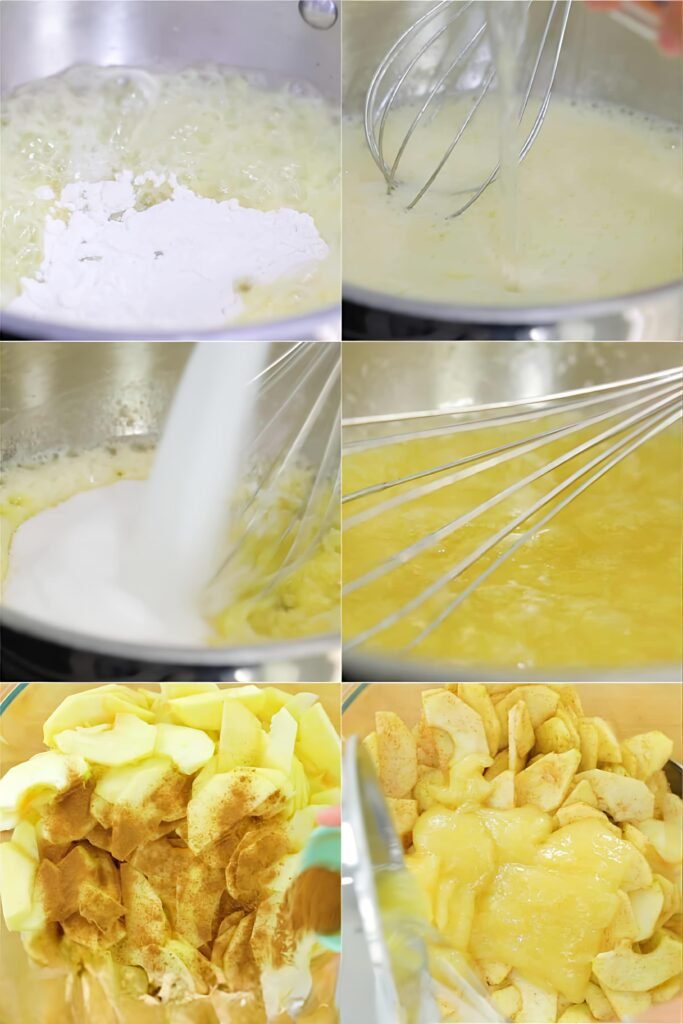
Make the filling. Stir all of the filling ingredients together in a large bowl. An optional step, and something I’ve been doing more recently, is to pre-cook the filling on the stove for just a few minutes. Why? I find it makes for a juicier, and even more flavorful filling.
Should You Cook The Apples Before Making Apple Pie?
You don’t have to pre-cook apples before making apple pie, but I prefer it. Just 5 minutes on the stove is beneficial for all of the ingredients in the apple pie filling: it gently softens the apples, helps the spices and juices come together, and produces a more flavorful filling. Keep it at 5 minutes, which helps the apples retain their texture; any longer than that and the apples will become mush.
Add the top pie crust. I have a whole tutorial on how to lattice pie crust, which is how I top the pictured pie. You’ll need a pastry wheel, pizza cutter, or sharp knife to make the lattice strips. A pair of kitchen shears is also handy for trimming any excess pie dough overhang.
Alternatively, you can make a double-crust pie by laying the second rolled-out pie crust on top. Slit some vents on top with a sharp knife.
Don’t want to mess with a top crust? Try my apple crumble pie or make an apple galette.
Flute the edges. Here is my video for how to flute pie crust. You could also simply crimp the edges with a fork, a method I show in the same video.
Brush with egg wash. Egg wash is a combination of egg and milk, and it’s what gives the pie crust its golden sheen. Pie crust looks very dull without the egg wash. For a little crunch and sparkle, I always add a sprinkle of coarse sugar on top, too.
Optional step: Refrigerate the pie for 20–30 minutes before baking, to help set the lattice.
Bake: Bake the apple pie until the crust is golden brown, and the filling is bubbling through the vents, about 1 hour. I recommend placing a baking sheet on the rack below the pie, to catch any bubbling-over juices.
Start baking the pie at an initial high temperature to help set the crust. After 25 minutes, reduce the oven temperature as the recipe card instructs below.
When I lower the oven temperature, I also add a pie crust shield. You can buy one, or you can make a DIY pie crust shield out of aluminum foil. Tear off a large square of aluminum foil, fold it in half, and then cut a half-circle in the center of the folded edge. Unfold it and place it on the pie. This will protect the edges, to ensure the crust doesn’t burn.
How Do I Know When Apple Pie Is Done?
A visual cue is helpful when determining the pie’s doneness. If the crust is golden, and the filling is bubbling up through the lattice, the apple pie is done. If you want to be precise, the internal temperature of the filling taken with an instant-read thermometer should be around 200°F (93°C) when done.
Cool the pie: The longer you let apple pie cool, the more the filling will set. I recommend cooling for at least 3 full hours before slicing and serving. I know, it’s nearly impossible to wait!
How to Avoid a Soggy Bottom Apple Pie
All of the careful steps I’ve outlined above help you avoid the dreaded soggy bottom crust. In short:
- Start at the higher oven temperature.
- Use a glass or metal pie dish, not ceramic.
- Keep the pie dough cold as you work with it.
- Don’t underbake the pie; use a thermometer.
- Bake until the filling is actively bubbling.
- Cool for at least 3 hours before slicing.

Apple Pie Recipe
Ingredients
- Homemade Pie Crust or All Butter Pie Crust (both recipes make 2 crusts, 1 for bottom and 1 for top)
- 10 cups (1250g) 1/4-inch-thick apple slices (about 8 large peeled and cored apples)*
- 1/2 cup (100g) granulated sugar (or packed brown sugar)
- 1/4 cup (31g) all-purpose flour (spooned & leveled)
- 1 Tablespoon (15ml) lemon juice
- 1 and 1/2 teaspoons ground cinnamon
- 1/4 teaspoon ground allspice
- 1/4 teaspoon ground nutmeg
- egg wash: 1 large egg beaten with 1 Tablespoon (15ml) milk
- optional: coarse sugar for sprinkling on crust
Method
- The crust: Prepare either pie crust recipe through step 5. The pie dough needs to be refrigerated for at least 2 hours before using.
- Roll out the chilled pie dough: On a floured work surface, roll out one of the discs of chilled dough (keep the other one in the refrigerator). Turn the dough about a quarter turn after every few rolls until you have a circle 12 inches in diameter. Carefully place the dough into a 9-inch pie dish that’s 1.5 to 2 inches deep. Tuck the dough in with your fingers, making sure it is smooth. Place the pie shell in the refrigerator while you prepare the filling.
- Make the filling: In a large bowl, stir the apple slices, sugar, flour, lemon juice, cinnamon, allspice, and nutmeg together until thoroughly combined.
- Optional pre-cook: Pour the apple filling into a very large skillet or Dutch oven. Cook over medium heat, stirring gently, until the apples begin to soften, about 5 minutes. Remove from heat and set aside to slightly cool. This step is optional, but I’ve found it makes for a juicier, more flavorful filling because it helps begin to soften the apples. If you can, take the few extra minutes to do this, because the flavor is worth it!
- Preheat oven to 400°F (204°C).
- Spoon the filling into the crust. It’s ok if it is still warm from the precooking step. It will seem like a lot of apples; that’s ok. Pile them high, and tightly together.
- Finish assembling: Remove the other disc of chilled pie dough from the refrigerator. Roll the dough into a circle that is 12 inches diameter. Using a pastry wheel, sharp knife, or pizza cutter, cut strips of dough; in the pictured pie, I cut 12 1-inch-wide strips. Carefully thread the strips over and under one another, pulling back strips as necessary to weave. (Here’s a lattice pie crust tutorial if you need visuals.) Use a small paring knife or kitchen shears to trim off excess dough. Fold the overhang back towards the center of the pie, and pinch the edges to adhere the top and bottom crusts together. Crimp or flute the pie crust edges to seal.
- Lightly brush the top of the pie crust with the egg wash. Sprinkle the top with coarse sugar, if using. Optional: Refrigerate the pie for 20–30 minutes to help set the lattice’s shape.
- Bake the pie on the middle oven rack for 25 minutes. I recommend placing a baking sheet on the bottom rack to catch any bubbling-over juices. After 25 minutes, keeping the pie in the oven, reduce the oven temperature to 375°F (190°C). Add a pie crust shield (see Note for homemade shield) to prevent the edges from over-browning. Continue baking until the pie is golden brown and the filling is bubbling through the lattice, 35–45 more minutes. If you want to be precise, the internal temperature of the filling taken with an instant-read thermometer should be around 200°F (93°C) when done. Tip: If needed towards the end of bake time, remove the pie crust shield and tent an entire piece of foil on top of the pie if the top looks like it’s getting too brown.
- Remove pie from the oven, place on a cooling rack, and cool for at least 3 hours before slicing and serving. Filling will be too juicy if the pie is warm when you slice it.
- Cover and store leftover pie at room temperature for up to 1 day or in the refrigerator for up to 5 days.
Notes
- Make Ahead / Freezing Instructions: A couple ways to make ahead of time! Make 1 day in advance: After it cools, cover tightly and keep at room temperature. The pie crust dough can also be prepared ahead of time and stored in the refrigerator for up to 5 days or in the freezer for up to 3 months. Baked pie also freezes well for up to 3 months. Thaw overnight in the refrigerator and allow to come to room temperature before serving. Prepared filling can also be frozen up to 3 months, thaw overnight in the refrigerator before using.
- Special Tools (affiliate links): Apple Peeler | Glass Mixing Bowl | Silicone Spatula | Large Skillet or Dutch Oven (for optional pre-cook) | Rolling Pin | 9-inch Pie Dish | Pastry Wheel or Pizza Cutter | Kitchen Shears | Pastry Brush | Coarse Sugar | Large Baking Sheet | Pie Crust Shield | Cooling Rack | Instant Read Thermometer
- Apples: See blog post above for the best apples to use. I usually use 4 Granny Smith and 4 Honeycrisp apples.
- Aluminum Foil Pie Crust Shield: You can purchase a pie crust shield or make one from aluminum foil. Cut a 14-inch square of aluminum foil. Fold in half. Cut out a 5-inch semi-circle on the folded edge. Unfold. Carefully fit the aluminum foil over the pie crust edges, securing down on the sides as best you can (careful, the pie is hot!), leaving the center of the pie exposed.
- Hand Pies: If you want to make smaller individual apple pies, try my apple hand pies recipe.